Wednesday, November 30, 2011
Cup Cozy Tutorial
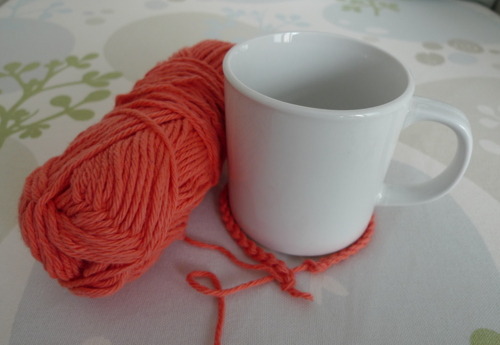
After making these amigurumi cups, I thought I’d try my hand at making some actual cup cozies since I love drinking tea. These cup cozies will protect your fingers when your cups get too hot from your warm drinks :) Follow along with my tutorial to make your very own!
Make a series of chain stitches and measure it around the cup you’d like to use. Make the chain a bit longer than the circumference of the cup.
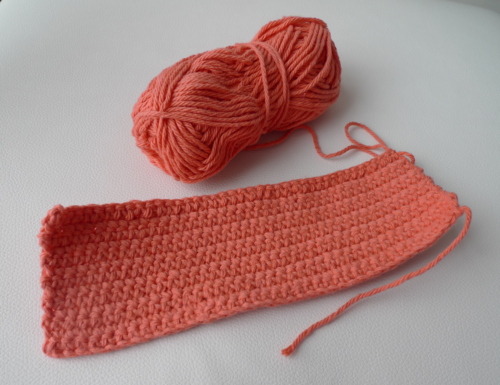
Single crochet along each row until you’ve reached your desired height.
Wrap the crocheted piece around the cup (to visualize where you’ll be crocheting). Make sure that the top edge of the piece has the “v’s” showing outwards (flip if necessary). Single crochet down the left side.
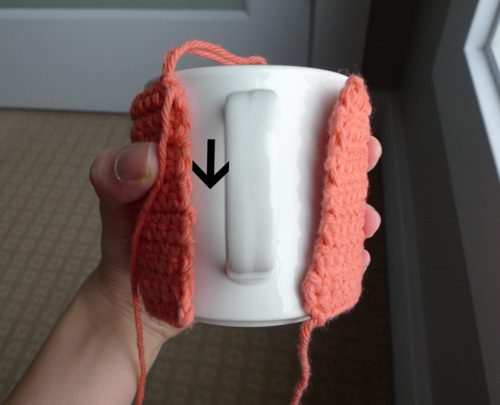
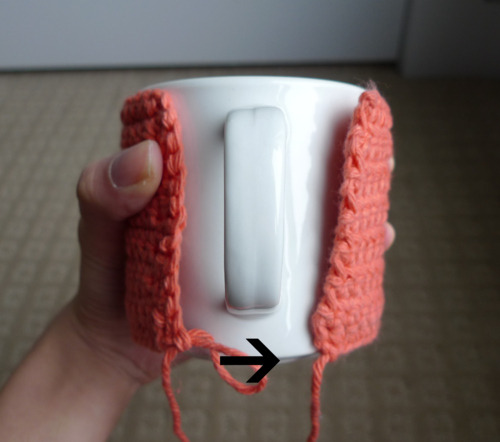
Next, make a series of chain stitches to run across the bottom of the cup. Make sure the cup cozy fits nice and snug, so do not chain too many stitches. Slip stitch to the right side.
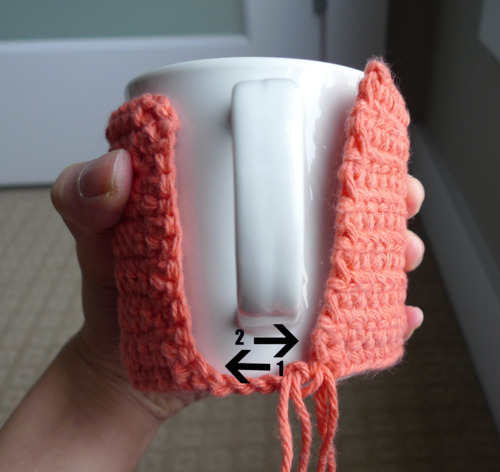
Single crochet back across from the right side to the left side (1), and then slip stitch to the left side. Then single crochet from the left side to the rght side (2) and then slip stitch to the right side.
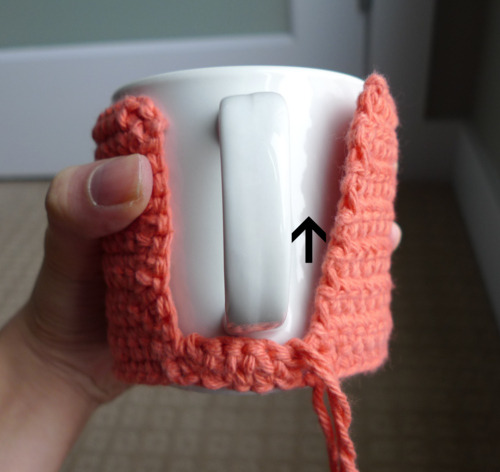
Next, single crochet up the right side.
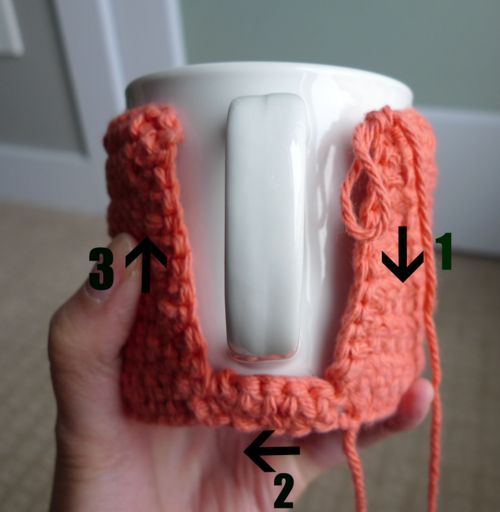
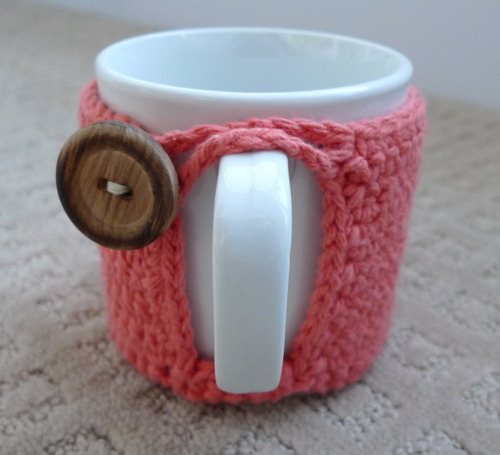
Now, single crochet down the right side (1), across from the right to the left side (2), and then up the left side (3) to give a decorative touch to all the edges. Of course, you can adapt how you crochet around the handle any way you’d like (depending on which side you started on).
Sew a button onto one of the sides.

Make a loop by chaining stitches on the other side. Measure it to make sure it comfortably and snugly loops around the button.

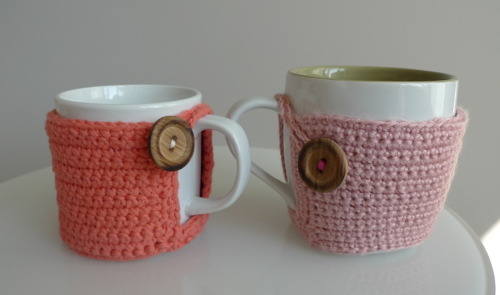
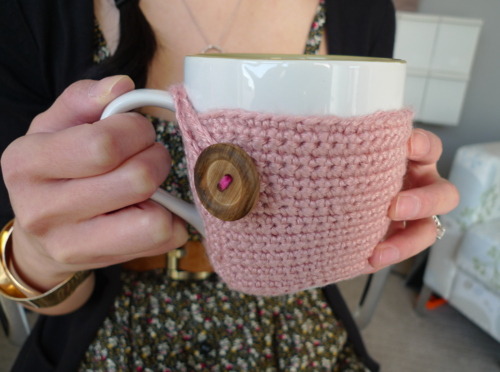
This is the finished product!
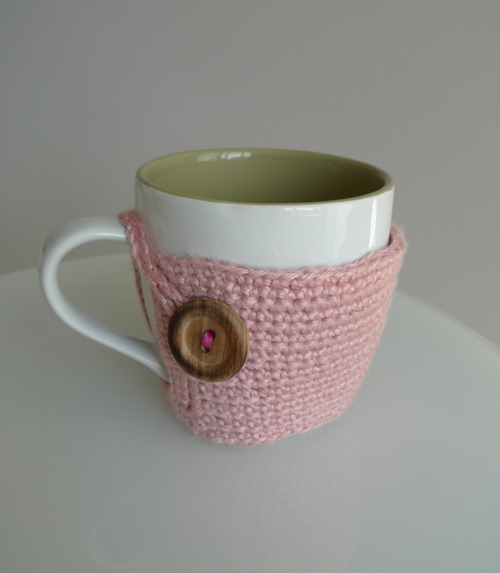
My mom loves drinking coffee and tea, so I wanted to make a cup cozy for her too. I made a few changes to this one since it was my second time around. I made the cup cozy lower so that there would be more space for the lips to drink from the cup. I also chose a cup that was two-toned (light grey on the outside, green on the inside) for colour variation, and I also used a deeper pink thread when sewing on the button for a nice pop of colour.
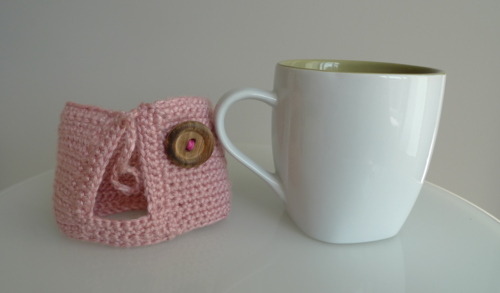
It was somewhat tricky crocheting a cup cozy for this cup since it tapered downwards and was not the same size throughout the height.

And so, I had to crochet this shape. I started off with the widest length and then decreased some of the rows throughout to accomodate for the tapered shape of the cup. To make life easier, I’d recommend choosing a cup that is the same width throughout.

This is how the cup cozy turned out! I followed a similar pattern to join the edges, this time adding a few more rows of single crochets along the sides and the bottom. I also placed the button further inwards and downwards to help hold the cup cozy up (otherwise the cozy would slip down).
I love the look of the crocheted cup cozies! They look both rustic and kind of modern at the same time.
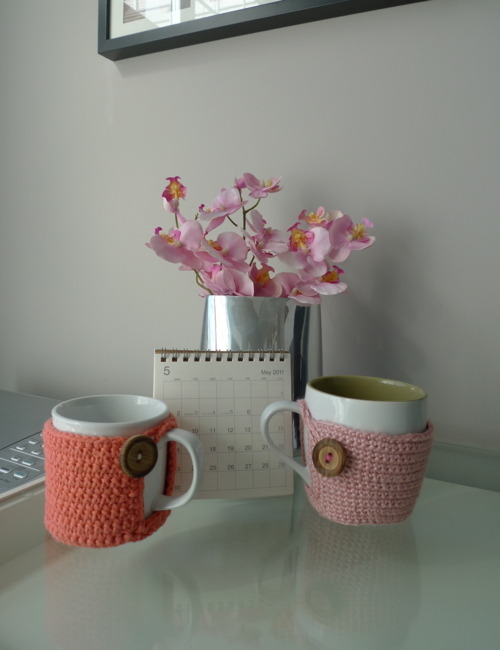
And here’s what it looks like in action! Now you can look cute and chic drinking your coffee and tea :)
Try making these cup cozies with different colours and buttons! I think it’d be cute to add felt shapes, faces (a smiley cup!), crocheted hearts and flowers to these cup cozies too :) These cup cozies would also make great gifts! Comment and let me know how it goes if you try making these! To see how other people’s cup cozies turned out, check out my “Crochet Corner” post about them here :)
Urban Jungle Slouchy Beanie
Ever since I took up crocheting again, I wanted to make myself a hat. Crocheting amigurumi is fun and all, but once in a while it’s nice being able to wear something you’ve crocheted rather than having it sit on a shelf :) Crochet Pattern Central has a great directory of free hat patterns here. I wanted to find a pattern for a modern, trendy hat, and after looking at countless photos, I found this absolutely beautiful pattern by Vicki Howell for CARON Yarns. The “Urban Jungle” is a slouchy beanie that is fairly simple to make because it essentially uses one stitch: the puff stitch! Once I learned how to do the puff stitch (Vickie demonstrates this in a video here), I became obsessed with it and made several other items using this beautiful stitch. Puff stitches look gorgeous with their texture and staggered rows. Since I’m used to making amigurumi with only the single crochet, it was nice learning and using something so different :)
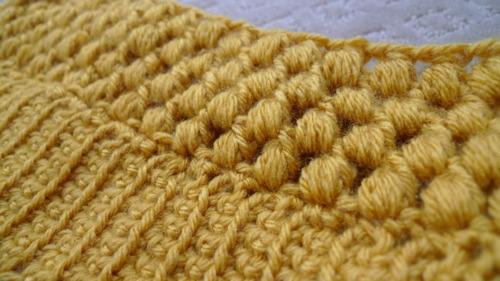
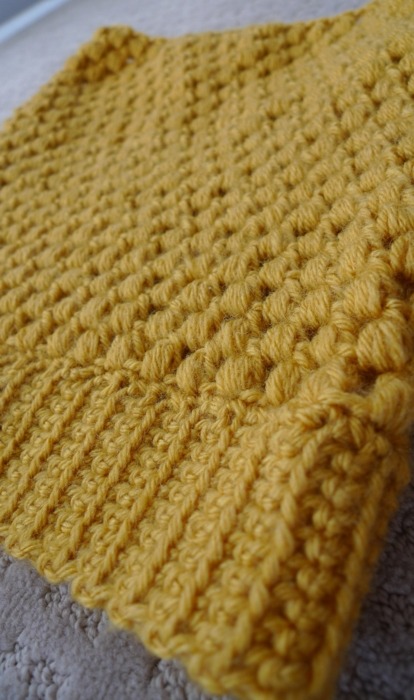
Before getting to the puff stitches, however, I needed to make a ribbed band. The ribbed look is created by crocheting in only the front loops. In Vickie’s pattern, she provides instructions on how to make a small/medium hat or a large/extra-large hat (number of stitches required for larger hat in brackets in her pattern). I went with the large/extra-large instructions because I notice that many hats sold in stores are a tad too tight for me. That’s one of the benefits of crocheting your own hat! You get to customize the size PLUS the colour :) I decided to go with this beautiful mustard colour which I thought would contrast with my hair nicely and still be easy to match with given its earthy tone.
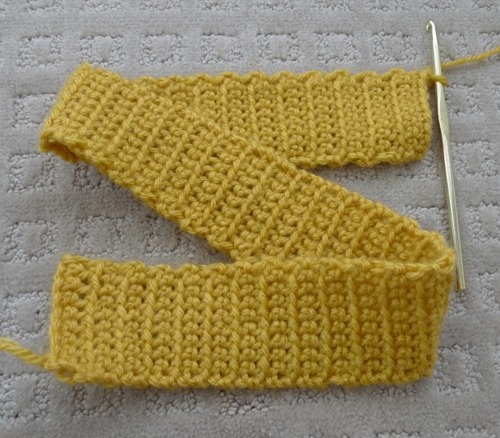
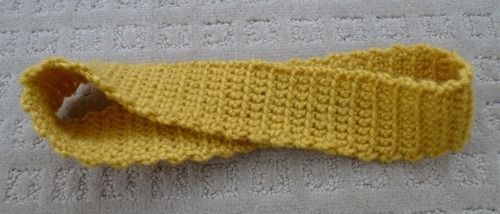
And so, once the strip measured about 22” (56 cm), I sewed the short ends together to form a band.
Next I worked single crochets around the edge of the band. Then came the fun part: the puff stitches! I continued with these puff stitches row after row.
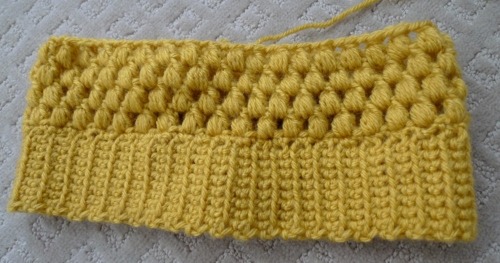
Aren’t the puff stitches gorgeous? I love the texture!
About 16 rows of puff stitches and one and a half balls of yarn later, I was ready to close off the top of the hat!
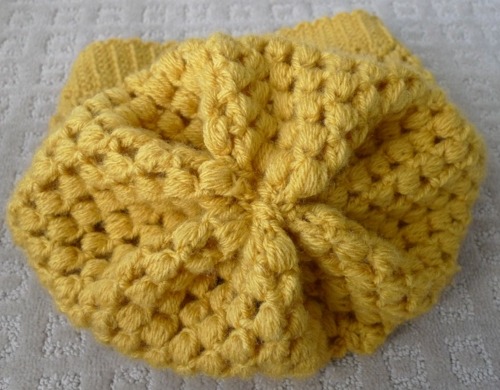
You close off the top of the hat by pinching the edges and single crocheting them together in a star formation. Vickie has a great video demonstrating this here.
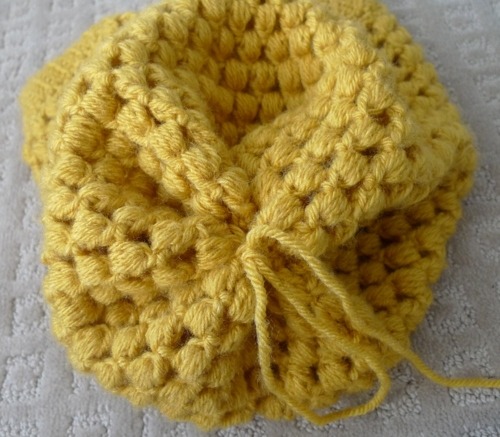
Here is my hat all seamed up! I love the look of the scrunched-up, gathered ends :)

Scarecrow
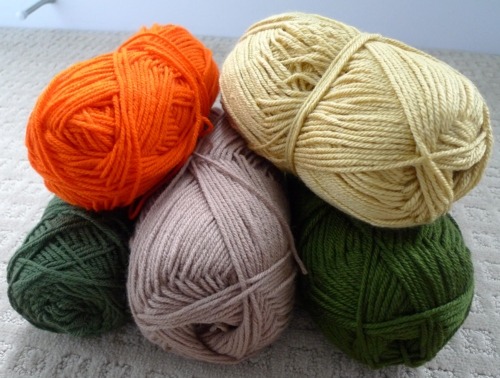
I loved making the Spring Bunnies for CRAFT a while back, so when they asked me to design an amigurumi for Halloween, I very happily and excitedly obliged! The first things that jumped to mind were witches, cats, and pumpkins. I scoured the web for images to see what had already been done. As Ryan and I were brainstorming together, we thought of making a scarecrow since we could include more detail and we were seeing a lot of them during this time of year. After we went out to buy some yarn in fall colours, we excitedly began designing our scarecrow!
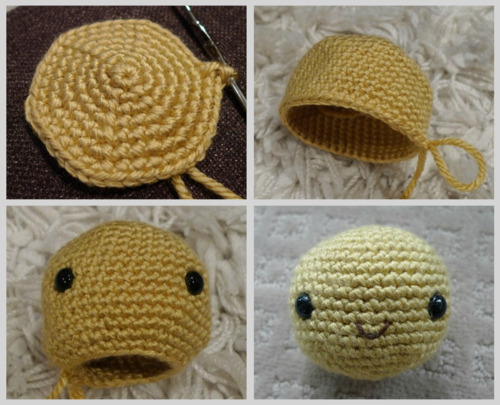
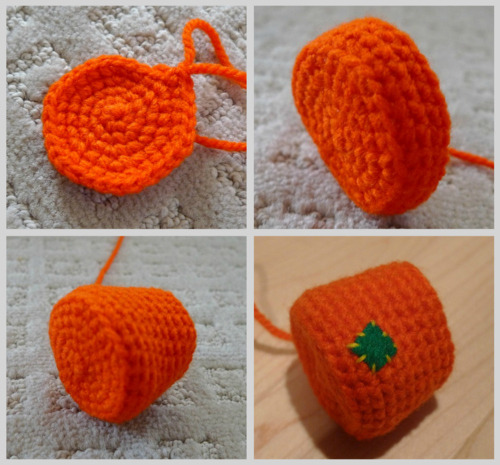
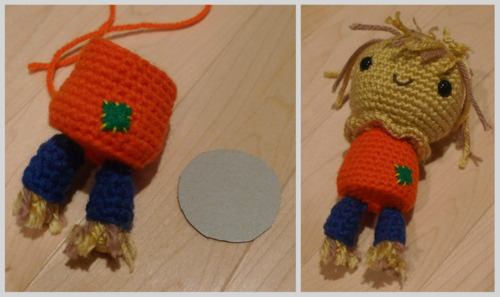
I used gold yarn to crochet a round ball for the head, placed the safety eyes, and embroidered a small smile.
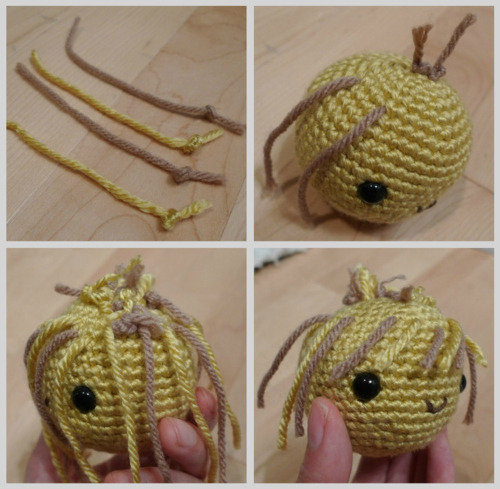
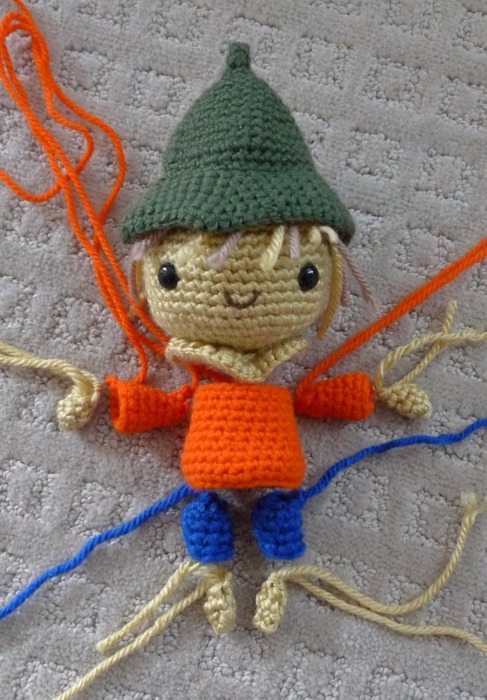
We cut strands of gold and tan yarn for the hair to add dimension. We knotted the ends of the strands and threaded them through the head. When we were done threading them, we cut them to our desired length. Notice how he kind of has side-swept bangs?
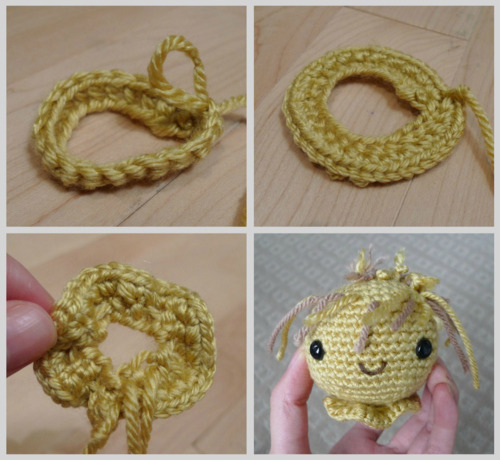
I crocheted a ring and ran a running stitch through the inner portion, causing it to frill up. This ring served as Scarecrow’s collar :)
We used orange yarn for the Scarecrow’s sweater and sewed a tiny green patch of felt to add more detail!
I then crocheted two blue pant legs and two orange sleeves.

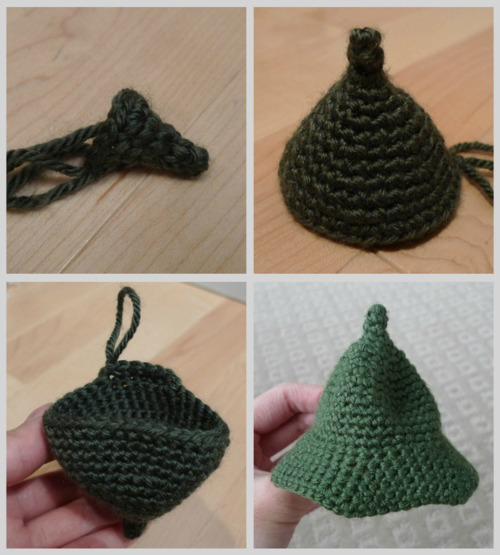
Next, I worked on the hat. I started with a pointy tip and then started expanding. Then, I started crocheting in the other direction to make it flare out on the bottom. Notice how the top part of the hat has the “right side” showing while the bottom part is the “wrong side” (see my post on “The Right Side of Amigurumi” here). This hat could also be used if you were making a witch or maybe a wizard!
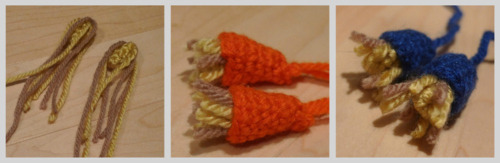
I then crocheted little balls for the hands and feet and got ready for assembly!
We draped gold and tan strands of yarn over the hands and feet to serve as the straw. Next, we glued the hands with the straw into the sleeves, and then the feet with the straw into the pant legs.
I then sewed the pant legs onto the sweater. To help the sweater keep its shape, we placed a circular piece of cardboard inside to provide a sturdy base (otherwise it might round too much after stuffing). Then we stuffed the sweater and sewed it onto the collar.
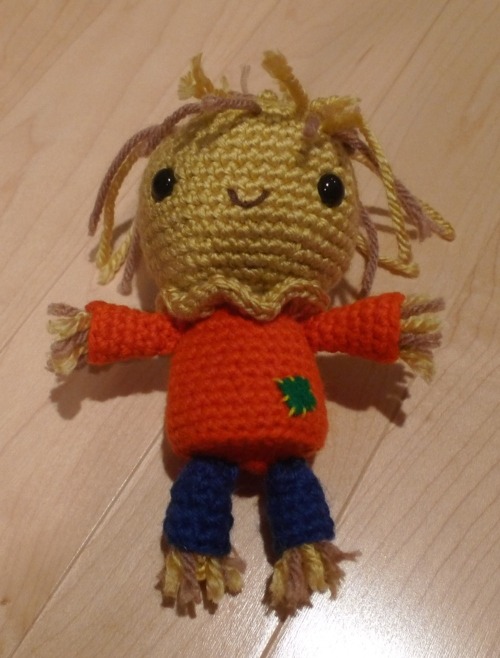
Now with his arms attached…
And now with his hat and pink cheeks…
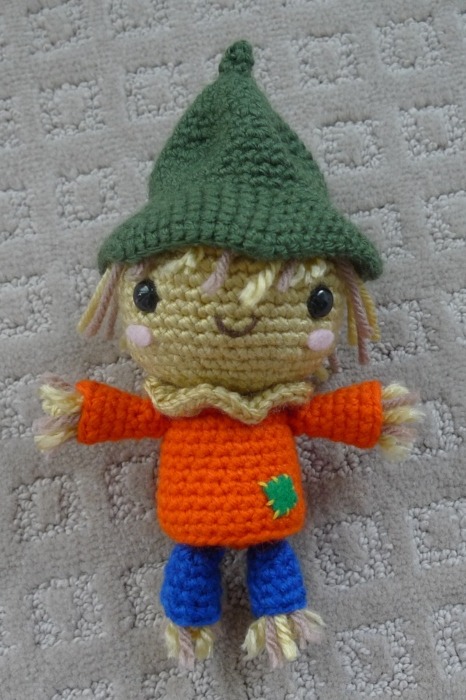
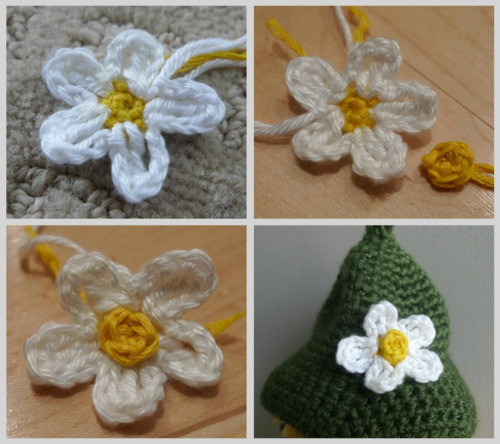
We had one more finishing touch: a beautiful daisy to adorn his green hat! We added another yellow circle in the middle to have it pop out more.
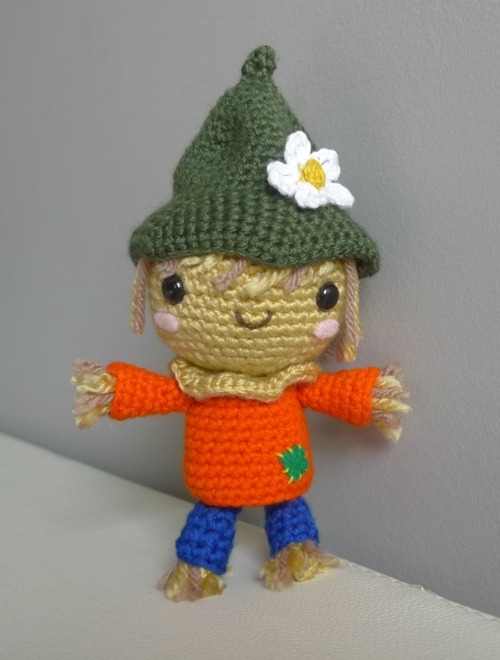
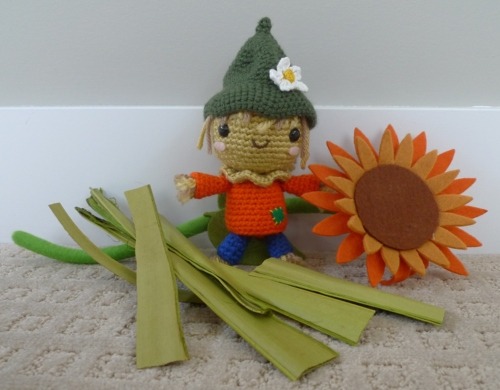
Here is the Scarecrow all complete! He doesn’t look very scary though, does he? I don’t think he’d be able to scare away any crows…
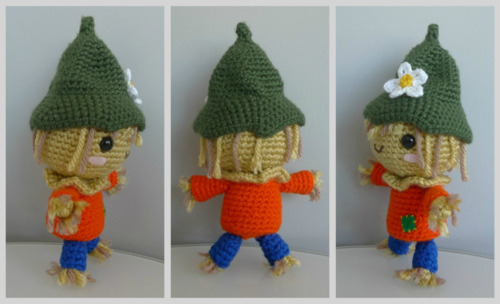
Here he is from various angles:
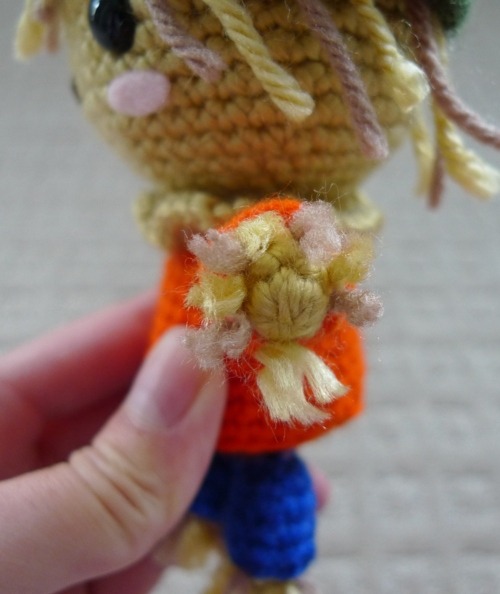
Here is a close-up of the fringe or “straw” coming out of his hands:
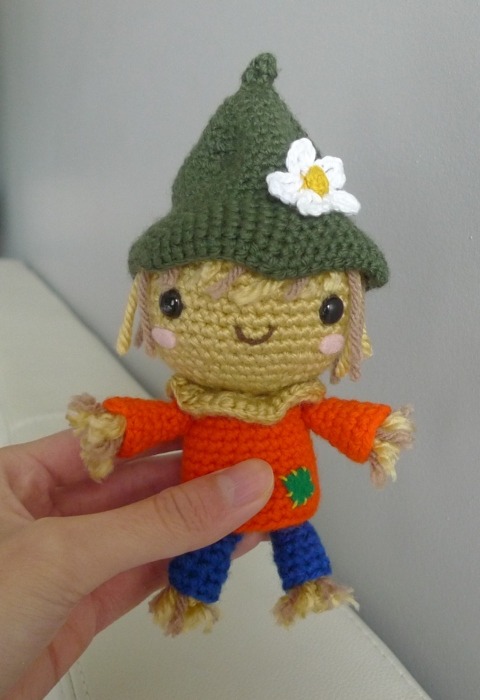
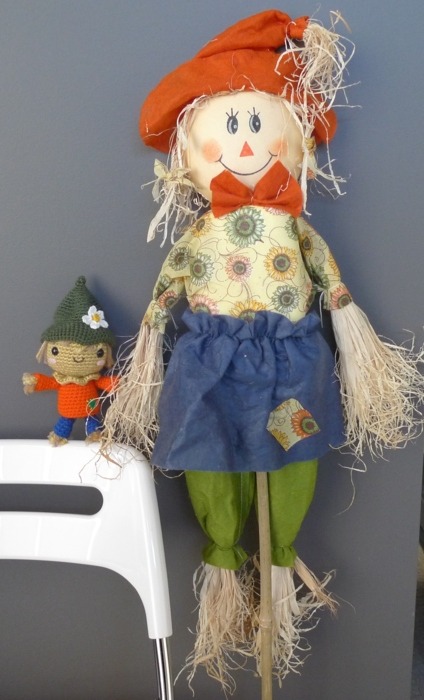
He’s so cute and friendly! Here’s a picture to show his relative size:
I wanted to take a picture of him with some fall props :)
We also picked up this scarecrow on sale over the weekend to decorate our house outside. Don’t they match nicely together?
This scarecrow would make a great decoration not only for Halloween but for Thanksgiving too! I’m also a HUGE fan of the musical Wicked. I saw it for the first time in New York at the Gerschwin Theatre and I absolutely L-O-V-E-D it. Everything was so magical, from the unforgettable songs to the captivating storyline, the beautiful sets, the costumes, and the vivid characters. I saw it again when it toured in my hometown. I pretty much know all the songs by heart and it isn’t uncommon for Ryan and I to burst into song singing “Popular” or “For Good”. This scarecrow would make a great gift for any “Wicked” or “Wizard of Oz” fan too :D Get the free pattern on the CRAFT site here, and please send me pictures if you end up making him! Have a Happy Halloween!
Siu Mai
Over the weekend, our church held a benefit event for the “Girls at Risk” program in Niger. This program is a 2 year apprenticeship that teaches girls aged 12-18 various life skills, such as nutrition, reading, sewing, and yes…crocheting! Through this program, the girls’ risk of early marriage, childbirth complications and poverty are reduced. You can read about this wonderful program on their blog here. I was inspired that three young girls at our church organized this whole benefit event including a silent auction, a luncheon, a presentation and various performances, to help girls around the same age as them all the way in Niger. I really wanted to help in some way, so I offered to crochet something for the silent auction.
It was Ryan’s idea to make the siu mai for this event. Siu mai are pork dumplings that are served during dim sum. In case you’ve never seen them in real life, here’s a quick pic we snapped on our most recent dim sum trip:

We first had the idea to crochet siu mai as we flipped through “Yummi ‘Gurumi”. I made up my own pattern (which can be found here) and decided to personify them as well. Doesn’t everything look cuter when you give it an expressive face?
These were pretty simple and easy to make (I’m sure you could easily figure out the pattern, but I will post the one I made up soon), particularly since they’re so small. I crocheted a yellow wrapper and tan filling for each siu mai.

To give the edge of the wrapper a crinkled look, I ran a tapestry needle through every two stitches near the top. I then pulled the ends like a drawstring bag.

Ryan helped me out with the various facial expressions. We used orange yarn for the mouth and sewed it right in the centre of each face to represent the “roe” (fish eggs) commonly found on siu mai.

Then we sewed the filling to the wrapper! I love how each siu mai has a different expression, from being happy to being scared silly of being eaten…

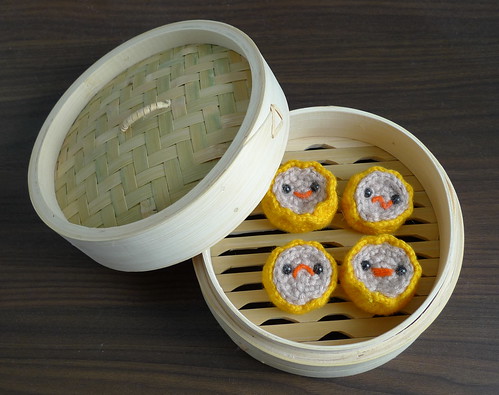
We ventured out to Chinatown to search for a bamboo steamer to make the siu mai look as authentic as possible! Here is a bamboo steamer that we purchased, complete with a cover!

And once you remove the cover…
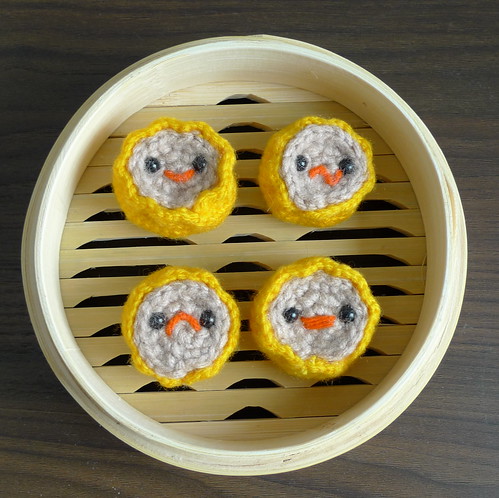
Ta da! Aren’t they so cute?
It was funny watching people’s expressions as they neared the silent auction table. You don’t come across amigurumi siu mai’s everyday :) Once again, the pattern to make these crocheted siu mai can be found here.
I feel very strongly about using your God-given skills and passions to help and love those in your life and around the world. If you would like to help the “Girls at Risk” program, please click here to donate. Scroll down and click “Donate Now”. Under the “Fund/Designation” drop-down menu, choose “Other“ and type in “Niger Vocational Training” in the message area. I am trying to support this organization with any proceeds that may come from this blog, and I know it’s really making a diference in these girls’ lives in Niger!