Ever since I took up crocheting again, I wanted to make myself a hat. Crocheting amigurumi is fun and all, but once in a while it’s nice being able to wear something you’ve crocheted rather than having it sit on a shelf :) Crochet Pattern Central has a great directory of free hat patterns here. I wanted to find a pattern for a modern, trendy hat, and after looking at countless photos, I found this absolutely beautiful pattern by Vicki Howell for CARON Yarns. The “Urban Jungle” is a slouchy beanie that is fairly simple to make because it essentially uses one stitch: the puff stitch! Once I learned how to do the puff stitch (Vickie demonstrates this in a video here), I became obsessed with it and made several other items using this beautiful stitch. Puff stitches look gorgeous with their texture and staggered rows. Since I’m used to making amigurumi with only the single crochet, it was nice learning and using something so different :)
Before getting to the puff stitches, however, I needed to make a ribbed band. The ribbed look is created by crocheting in only the front loops. In Vickie’s pattern, she provides instructions on how to make a small/medium hat or a large/extra-large hat (number of stitches required for larger hat in brackets in her pattern). I went with the large/extra-large instructions because I notice that many hats sold in stores are a tad too tight for me. That’s one of the benefits of crocheting your own hat! You get to customize the size PLUS the colour :) I decided to go with this beautiful mustard colour which I thought would contrast with my hair nicely and still be easy to match with given its earthy tone.
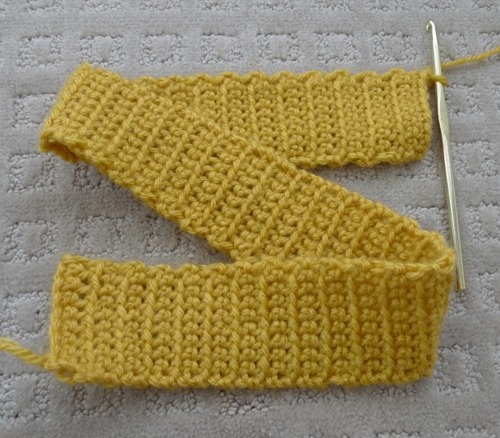
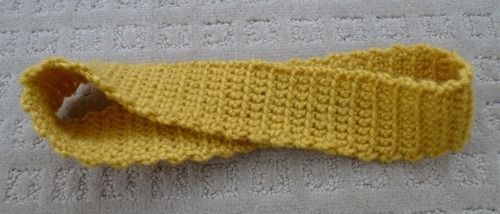
And so, once the strip measured about 22” (56 cm), I sewed the short ends together to form a band.
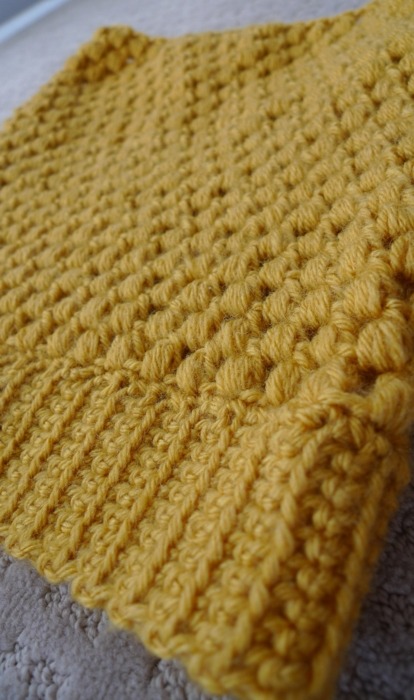
Next I worked single crochets around the edge of the band. Then came the fun part: the puff stitches! I continued with these puff stitches row after row.
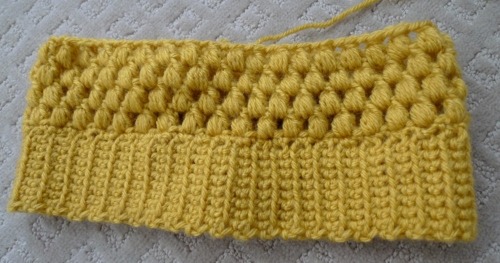
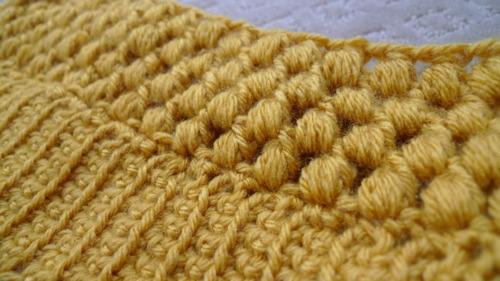
Aren’t the puff stitches gorgeous? I love the texture!
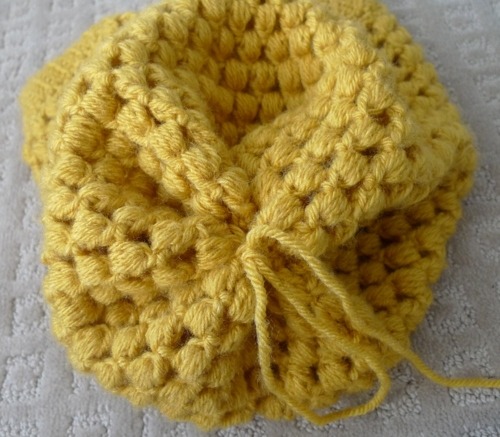
About 16 rows of puff stitches and one and a half balls of yarn later, I was ready to close off the top of the hat!
You close off the top of the hat by pinching the edges and single crocheting them together in a star formation. Vickie has a great video demonstrating this here.
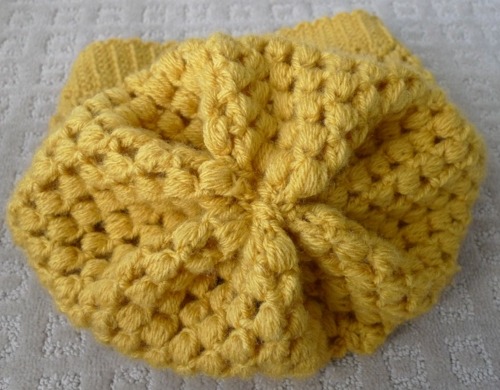
Here is my hat all seamed up! I love the look of the scrunched-up, gathered ends :)

1 comments:
Wow, cool hat! That is exactly the kind of hat I was looking for! Thank you for the info and mini tutorial.
Post a Comment