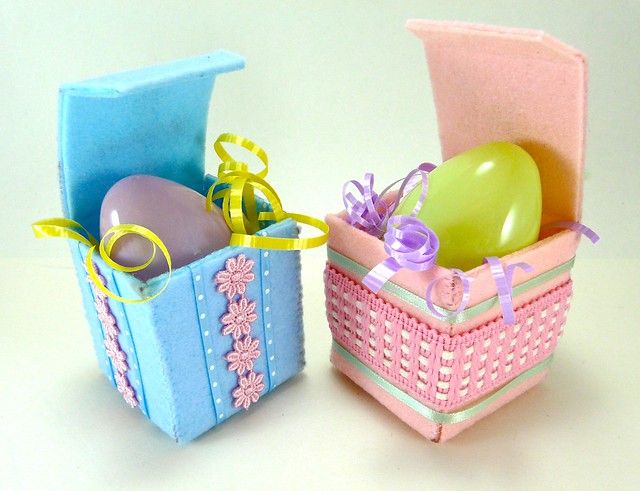
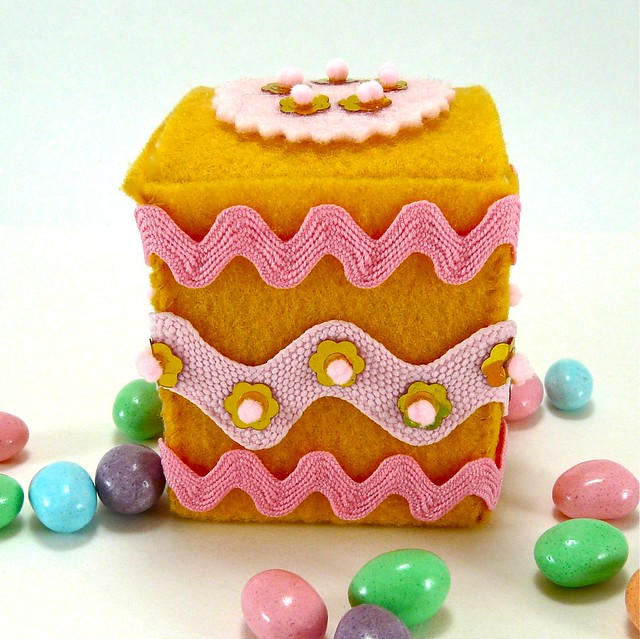
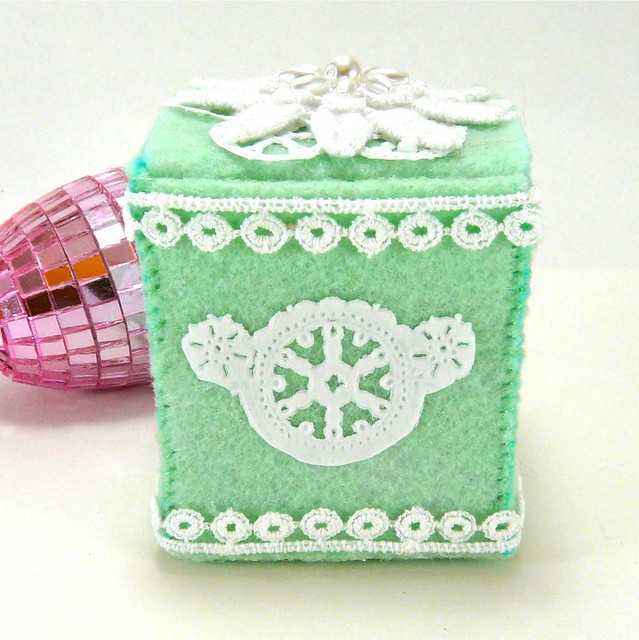
I love a good Easter basket as much as the next gal, but I adore the idea of this simple little gift box. Sometimes you just want to give one beautiful egg or a few choice candies to a favorite teacher, co-worker, or friend, and this little presentation is perfect.
The whole thing is constructed from two kinds of felt: regular wool or acrylic felt, and Friendly Felt, which is a recycled-fiber stiff felt. Fusing the two together, you can really construct just about anything. The boxes make up in just a few minutes, and decorating them gives you a great excuse to rummage about in your stash.
Materials (per box):
One 9×12 sheet Friendly Felt
One 9×12 sheet acrylic or wool felt
PDF Template
Fine-point Sharpie
Scissors
Ruler
Bone Folder
Lightweight fusible webbing
Iron and ironing board
Pressing cloth
Hand-sewing needle and thread
Craft glue
Assorted embellishments
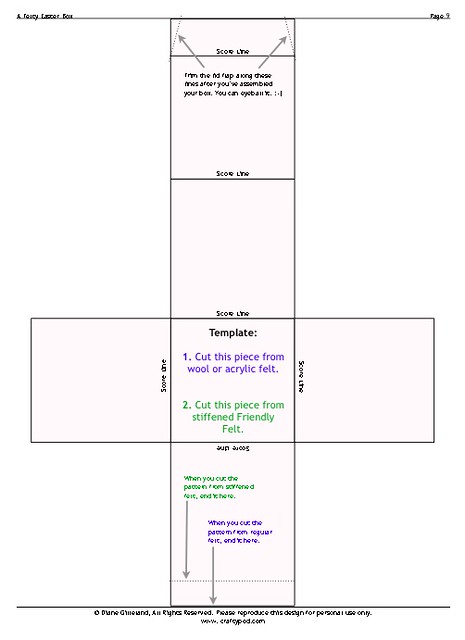
The PDF has a full-size printable pattern, but you can also draw up your own, using your favorite drawing program. It’s really just a cross-shaped series of boxes, arranged as you see here. In my version, the top and bottom of the box measure 2″ square, and each side measures 2″ wide by 2 1/4″ tall. That’s sized to fit a US Grade A Large egg, by the way.
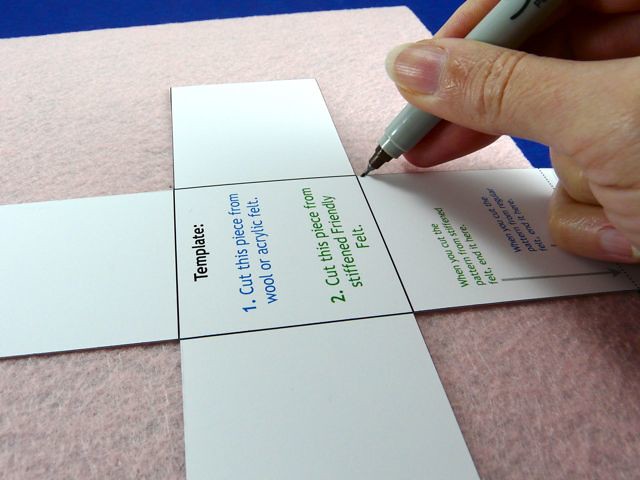
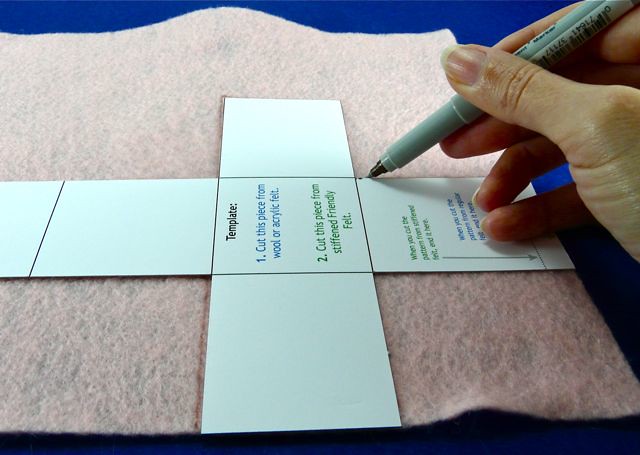
Step 1: Print out your pattern onto card stock and cut it out. Trace it onto a sheet of Friendly Felt with a fine-point Sharpie.
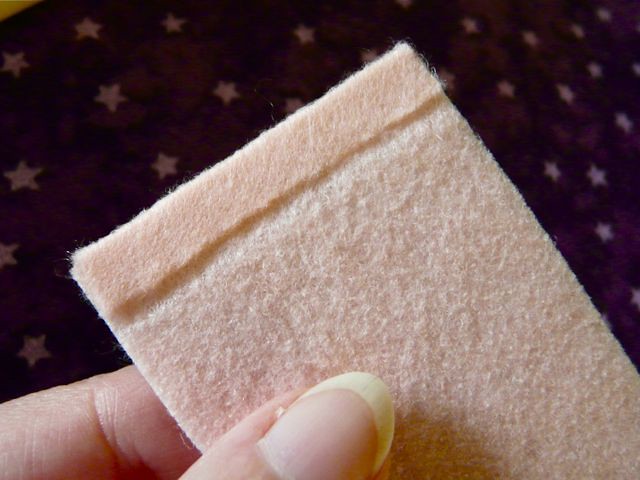
Step 2: Before you lift the pattern from the Friendly Felt, mark it where the lines go across the long side. We’ll need those marks in the next step.
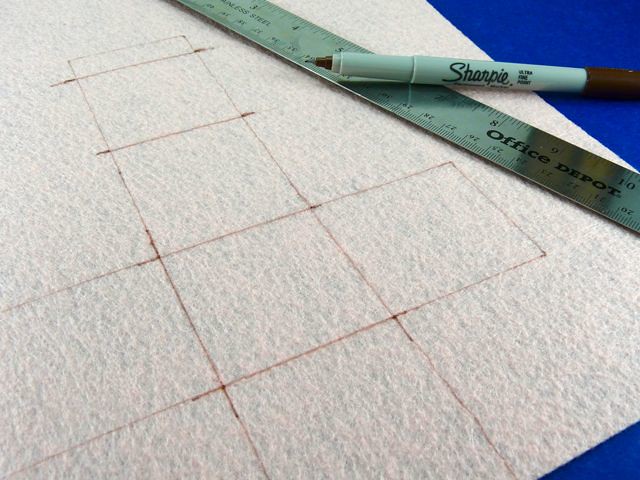
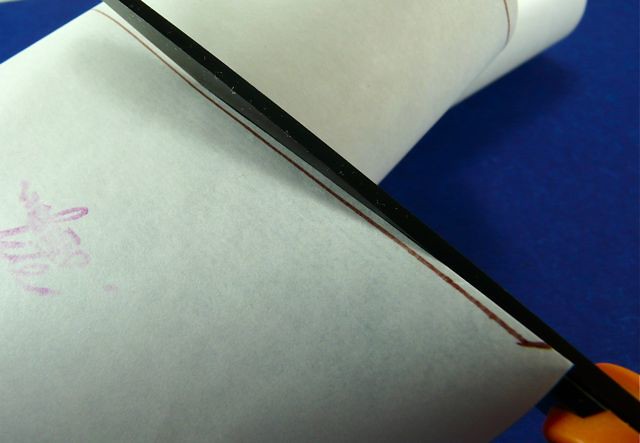
Step 3: Now, use a ruler and your Sharpie to trace all the lines from your pattern onto the felt (and here’s where you’ll need those marks from Step 2). Then, go ahead and cut the pattern out along the outermost lines.
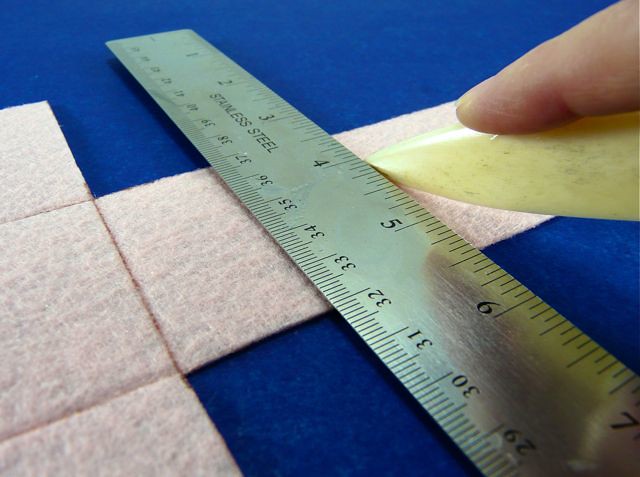
Step 4: The reason we drew in those interior lines is so that we can score them. So use a ruler and a bone-folder to firmly score the Friendly Felt along all these lines. We want these scores nice and deep, so don’t be afraid to put a little muscle into it.
Step 5: Then, fold the Friendly Felt along all these score lines. Fold it both directions, and crease the folds. We want nice, prominent creases here, so we can locate these folds later on. Set the finished Friendly Felt piece aside.
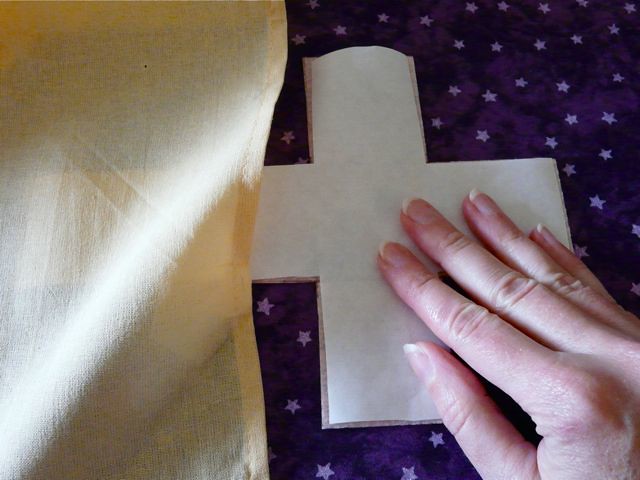
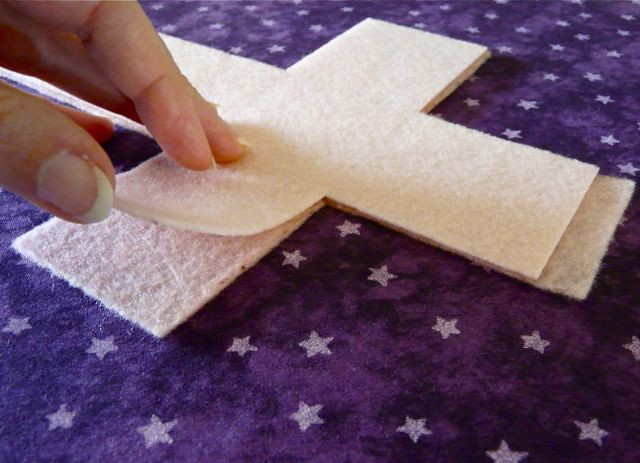
Step 6: Now, trace the same pattern onto regular felt and cut it out. (You don’t need to draw in any of the interior lines here – just trace and cut the overall outline.)
Step 7: Lastly, trace the pattern one more time onto some fusible webbing. (Again, no need to worry about those interior lines.) When you cut out the webbing, cut about 1/8″ inside your traced lines, as shown here. You don’t have to be super precise about this. You just want the webbing piece to end up slightly smaller than the felt pieces.
Step 8: Place the Friendly Felt piece on your ironing board with the traced lines facing up. Place the webbing on top, with the paper backing facing up. Center the webbing piece over the Friendly Felt piece.
Step 9: Heat your iron to the setting recommended on your package of fusible webbing. Place a pressing cloth over the Friendly Felt and webbing, being careful not to disturb their alignment.
Step 10: Follow the package directions to fuse the webbing to the Friendly Felt. When you iron over Friendly Felt, it will actually melt a little and become very soft and pliable. That’s why a pressing cloth is so important – to protect your iron! When you’re done ironing, don’t handle the Friendly Felt until it has cooled and re-stiffened.
Step 11: Once the Friendly Felt has cooled, you can peel away the paper backing. You should see a uniform shiny coating of fusible webbing on your Friendly Felt now.
Step 12: Now, place your regular felt on your ironing board. Place the Friendly Felt piece over it, with the webbing side down. Line up the long edges of both pieces.
Step 13: Place the pressing cloth over this and follow the package directions once again to fuse the two pieces together. Once again, let the felt cool and re-stiffen before you handle it.
Check all the edges carefully to make sure the two layers have completely fused together. If not, put them back under the pressing cloth and iron them some more. You may find it helpful to flip the whole thing over and press it from the other side as well.
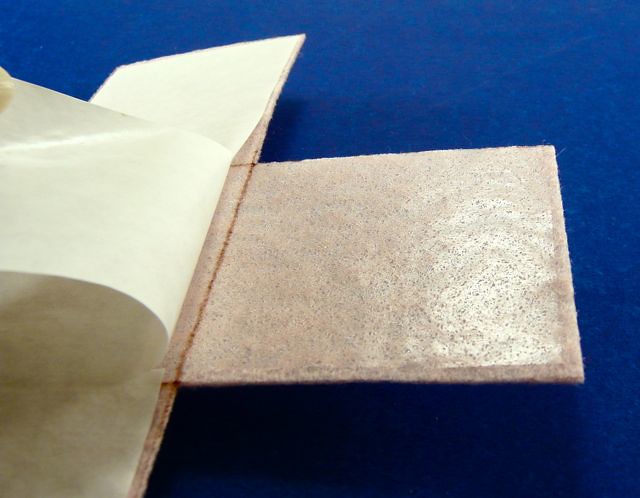
Step 14: In my pattern, there’s a little extra felt that wraps over the end of the Friendly Felt. It you’re using my pattern, then at this point you can fold that felt over and use a little scrap of fusible webbing to fuse it in place.
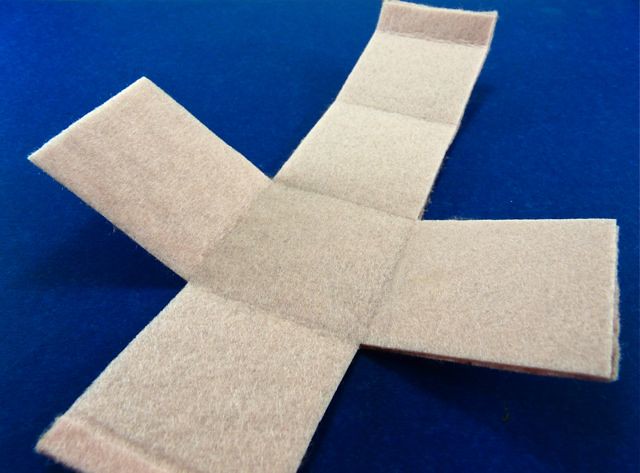
Step 15: OK, with everything fused together, it’s time to re-fold the felt where you made all those deep scores in Step 4. We’ve hidden all those lines we drew between the layers, but you should be able to give the felt a gentle bend and it’ll fold right on the score lines. (If you’re having trouble identifying where a fold is, you can hold the felt up to a light and easily see the drawn score lines. Crease the felt once again along these lines.
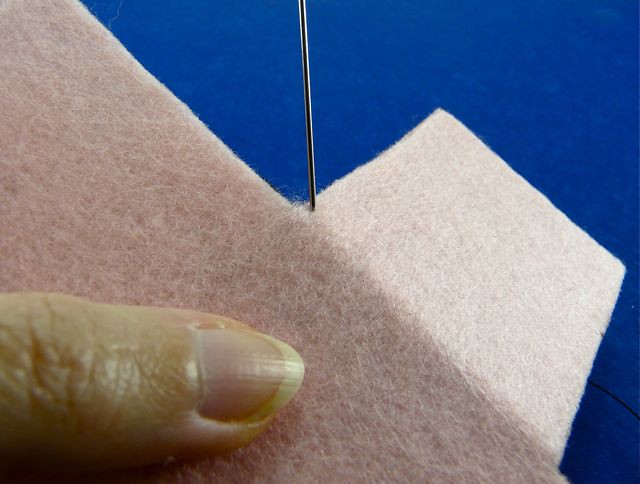
Step 16: We’re going to whip stitch the corners together. So first, thread a needle with a single thickness of sewing thread, and tie a good knot in one end.
Hold the box piece so that the Friendly Felt side faces down. Bring the needle up at one corner as shown here, catching one side of the box. Pull the thread all the way through so the knot can hide on the Friendly Felt side.
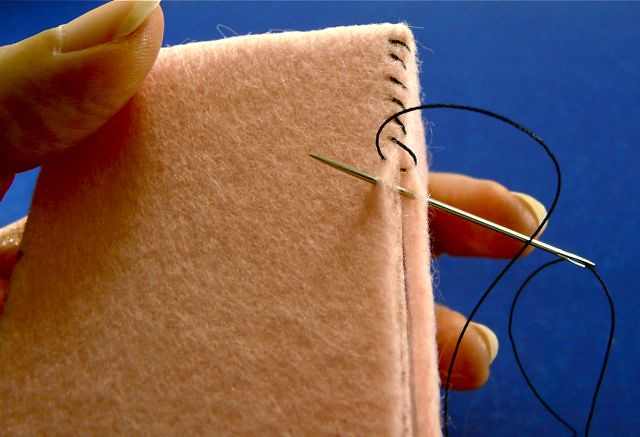
Step 17: Now, gently bring the two sides together, forming a corner. Pass your needle through both sides to form the first stitch.
Step 18: Continue stitching in this manner to join the corner. (By the way, I’m using contrasting thread here so it’s easy to see. You’ll want to use matching thread.)
Step 19: When you’ve sewn your way to the top of the seam, finish your last stitch so the needle is on the Friendly Felt side of the seam. Finish the thread by passing it through a few stitches here at the back side. Repeat this process to sew up the other three corners.
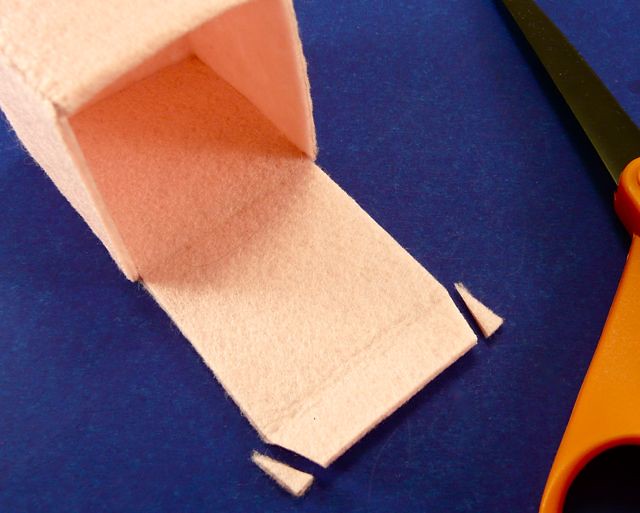
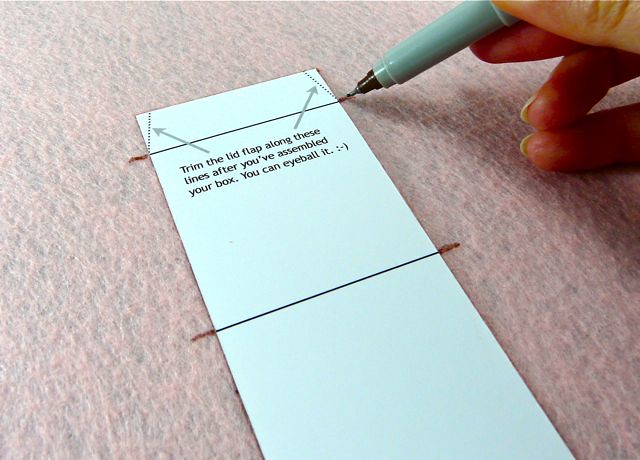
Step 20: One last step: there’s a small tab on the lid of the box that tucks into the box when you close it. Cut the sides of this little tab at angles, as shown here.
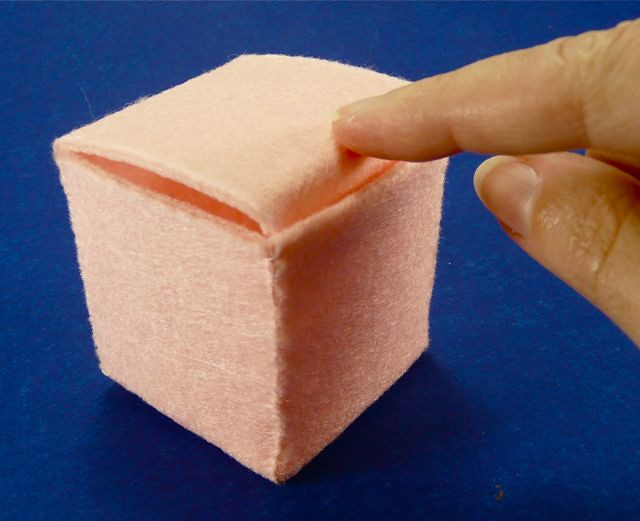
Now you have a little box-shaped blank canvas to decorate! All the versions you see here, I decorated by raiding my collections of ribbons, trims, lace, and ric rac. You can attach embellishments with hot glue or tacky glue
0 comments:
Post a Comment