Here’s what you need:
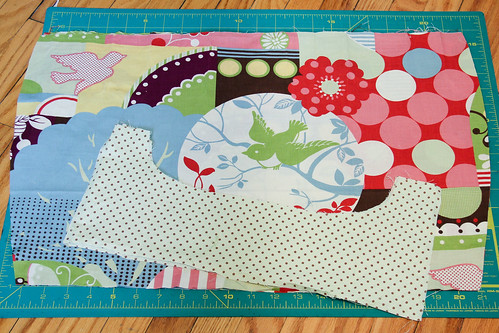
two pieces of your main fabric cut in shape A
four pieces of the top shape (B) in a contrasting fabric
two pieces of a lining fabric in shape C
one piece of the long rectangle for the strap in the contrasting fabric
two pieces of the top shapes (B) and one of the strap in a medium weight interfacing

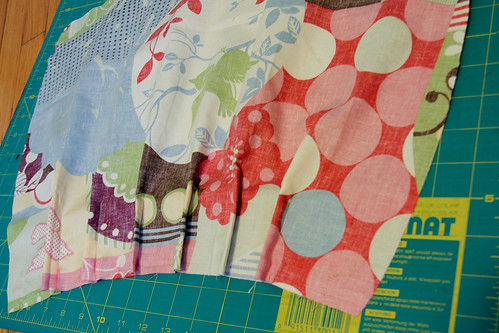
1) Along the longest (22″) edge of the main fabric pieces, mark along the top at the following intervals:
3″ – 4″ – 6″ – 7″ – 9″ – 10″ – 12″ – 13″ – 15″ – 16″ – 18″ – 19″
2) Match each of the marked 1″ pairs together by folding them to meet each other (right sides together) and stitch down about 1″ to hold the pleat in place, as shown below.
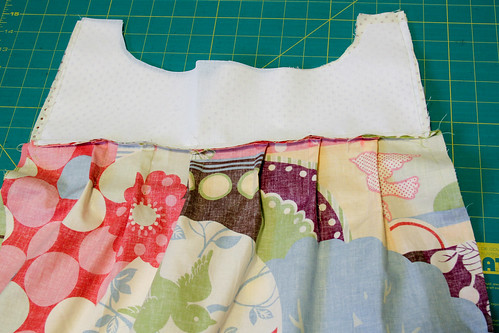
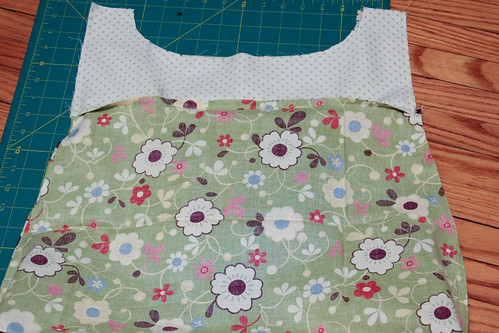
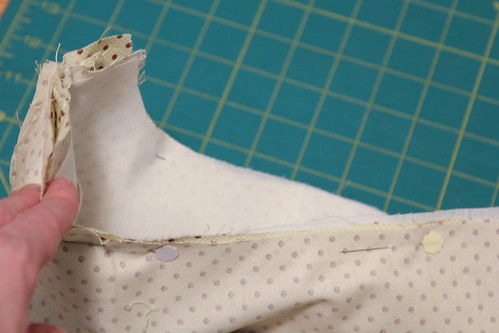
3) Place the interfacing on top of the top piece and line up with the top edge of the main piece, right sides together. With the pleats laid flat pointing toward the edges, stitch the top piece to the main body. Repeat with the other pieces for the bag back. Line up the two sides of the purse right side together and stitch around the sides and bottom.
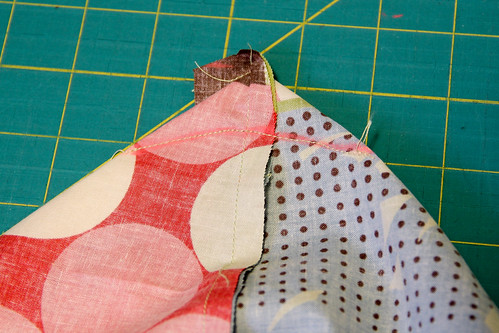
4) Pinch the corners of your bag flat so the seams line up and it forms a triangle. Mark two inches off on each of the side of the triangle, and one inch down from the middle of the point and draw a curve connecting these three points (try to make your curve less wonky than mine). Trim the excess fabric from the point.
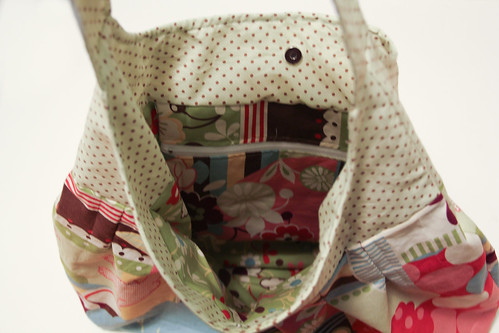
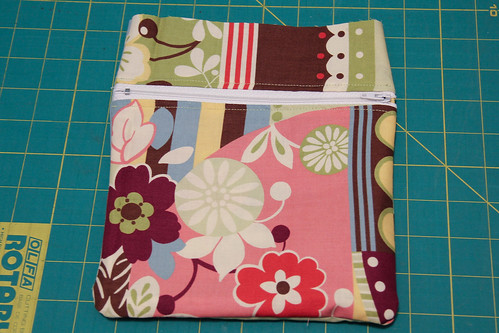
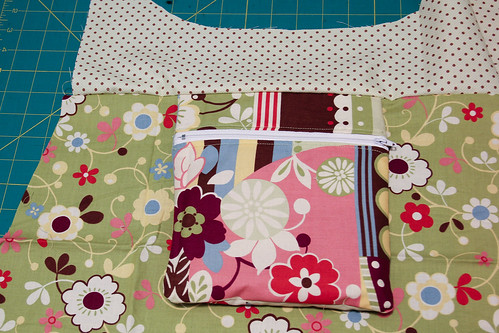
5) If you’d like to add a little zippered pocket, use this tutorial to create a little pouch and don’t bother to seam up the top edge.
6) When stitching the tops to the lining main body, insert the pocket in between the two pieces.
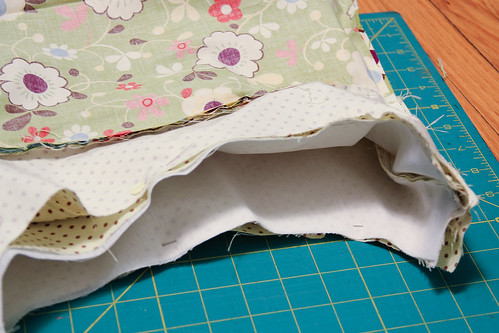
7) Stitch the lining pieces together down the sides and bottom, leaving a small opening in one side to turn the bag. Repeat step four on both the corners.
8 ) Fold the strap piece in half lengthwise and stitch the sides together down the length of the strap. Using a safety pin turn it right side right-side out and press flat.
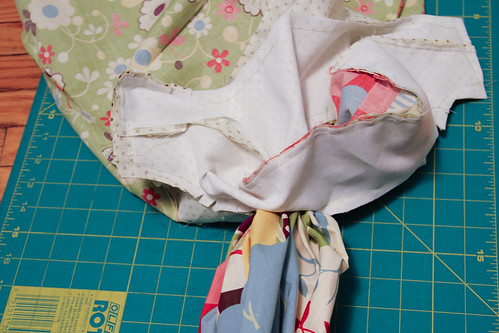
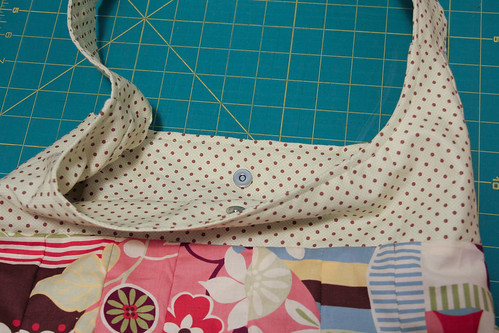
9) If you want to add a magnetic snap closure, now would be the time to attach it to both of the top lining pieces. Then, with both the main bag and lining pieces turned inside out so the right sides are together, put the main bag inside the lining and line up the top edges; pin in place.
10) Slide the strap between the two layers, and line up the ends so they match the sides. Make sure the strap isn’t twisted before you sew (I have learned that one from experience).
11) Stitch all the way around the top edge of the bag to sew the lining to the main body, stitching over the ends of the strap pieces as well. Cut small notches in the seam allowance around the curved parts so it will lay flat. Turn the bag right side out through the hole you left in the lining. Slip stitch the hole closed.
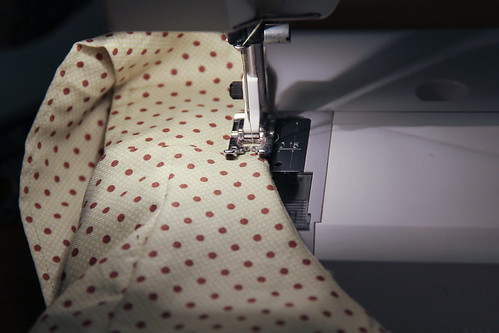
12) Top stitch 1/4 inch from the edge all the way around the top and straps on both sides of the bag.
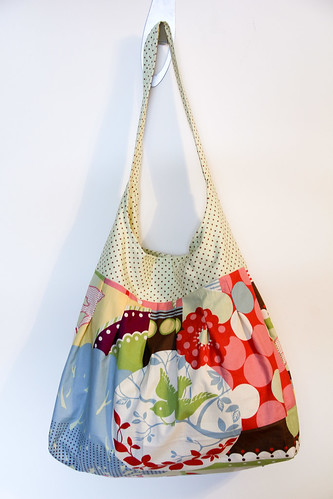
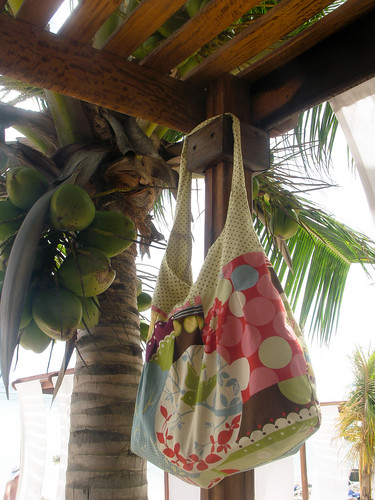
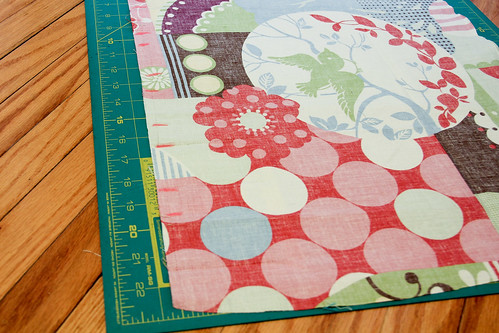
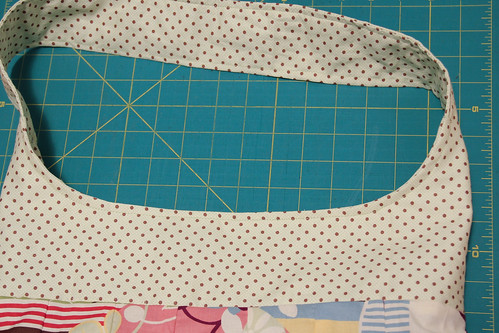
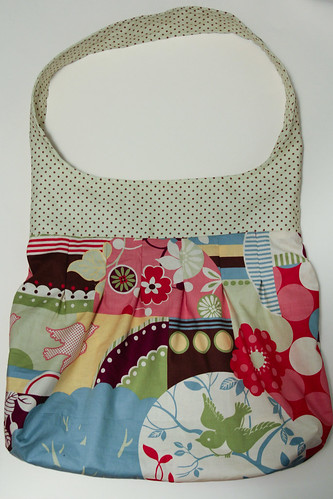
13) And voila, this is what it should look like.
0 comments:
Post a Comment